Introduction
pgAdmin is a popular open-source tool for managing PostgreSQL databases. The package's user-friendly interface simplifies tasks like managing databases, executing SQL queries, and configuring servers. Accessible via a web application, pgAdmin is versatile and suitable for projects of any size, from small applications to enterprise-level databases.
This guide shows you how to install pgAdmin on the Ubuntu 24.04 server so that you can manage your PostgreSQL database using a web interface instead of terminal commands.
Prerequisites
Before you begin:
- Deploy a Digital Ocean droplet running Ubuntu 24.04.
- Create a non-root sudo user. Read our guide on How to Create a Non-Root Sudo User on Ubuntu 24.04
- Install PostgreSQL server. Read our guide on How to Install PostgreSQL on Ubuntu 24.04
Install pgAdmin
The latest version of pgAdmin is not available in the Ubuntu's default repositories. To install the latest version, you'll manually add the pgAdmin GPG key and the repository. This approach allows you to fetch the pgAdmin packages directly from the official source maintained by the pgAdmin team.
- SSH to your server using your favourite SSH client. For instance PuTTY for Windows.
-
Add the pgAdmin Public GPG Key. The key ensures the integrity and authenticity of the packages from the pgAdmin repository. The GPG key verifies that the software you're downloading hasn't been tampered with.
CONSOLE$ curl -fsSL https://www.pgadmin.org/static/packages_pgadmin_org.pub | sudo gpg --dearmor -o /usr/share/keyrings/packages-pgadmin-org.gpg -
Add the custom pgAdmin repository to your system.
CONSOLE$ sudo sh -c 'echo "deb [signed-by=/usr/share/keyrings/packages-pgadmin-org.gpg] https://ftp.postgresql.org/pub/pgadmin/pgadmin4/apt/$(lsb_release -cs) pgadmin4 main" > /etc/apt/sources.list.d/pgadmin4.list && apt update' -
Refresh the package information index to ensure your system knows the pgAdmin repository you've added.
CONSOLE$ sudo apt update -
Download and install pgAdmin.
CONSOLE$ sudo apt install pgadmin4 -y
Configure pgAdmin
Now that you have installed pgAdmin, the next step involves configuring Apache web server and initializing the pgAdmin settings. Follow the steps below.
-
Run the
/usr/pgadmin4/bin/setup-web.sh, a built-in pgAdmin script that automates configuring and deploying pgAdmin as a web application.CONSOLE$ sudo /usr/pgadmin4/bin/setup-web.sh -
Enter your email address and password. You'll use these credentials to access the pgAdmin web interface.
CONSOLESetting up pgAdmin 4 in web mode on a Debian based platform... Creating configuration database... NOTE: Configuring authentication for SERVER mode. Enter the email address and password to use for the initial pgAdmin user account : Email address: admin@example.com Password: your_password_here Retype password: your_password_here pgAdmin 4 - Application Initialisation -
Press Y and Enter to allow pgAdmin to configure Apache.
CONSOLEpgAdmin 4 - Application Initialisation ====================================== Creating storage and log directories... We can now configure the Apache Web server for you. This involves enabling the wsgi module and configuring the pgAdmin 4 application to mount at /pgadmin4. Do you wish to continue (y/n)? y -
Press Y and enter again to instruct pgAdmin to restart Apache.
CONSOLEThe Apache web server is running and must be restarted for the pgAdmin 4 installation to complete. Continue (y/n)? y Apache successfully restarted. You can now start using pgAdmin 4 in web mode at http://127.0.0.1/pgadmin4
Allow pgAdmin Through the Firewall
To access pgAdmin on your web browser, you must enable the firewall to allow traffic on the port used by pgAdmin (typically port 80 or 8080, depending on your configuration). This ensures that incoming requests from your browser can reach the pgAdmin web server.
-
Allow port
80through the firewall.CONSOLE$ sudo ufw allow 80 -
Reload the firewall to accept the new changes.
CONSOLE$ sudo ufw reload -
Visit the following URL on your web browser and replace
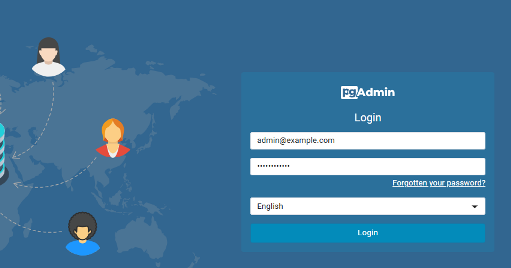
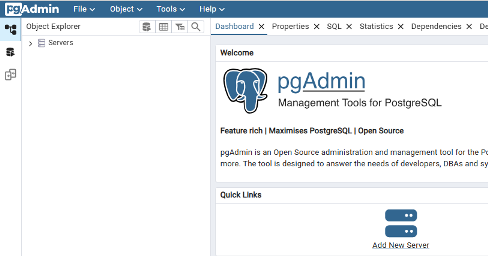
192.168.0.1with your server's public IP address.http://192.168.0.1/pgadmin4You should now see the default pgAdmin login page. Enter the credentials you created earlier to log in to the pgAdmin dashboard and click Login.

-
Navigate through the pgAdmin dashboard.

Conclusion
In this guide, you've installed pgAdmin on Ubuntu 24.04, ensuring a reliable setup for managing PostgreSQL databases. You started with adding the pgAdmin repository to access the latest pgAdmin version and proceeded to installing the necessary packages. Finally, you've configured the firewall to allow access to the pgAdmin on a web browser. With the pgAdmin setup in place, configure a server and start managing your PostgreSQL databases.
More Resources
Consider visiting the following resources for more PostgreSQL installation and integration guides: