Introduction
Apache is a powerful open-source web server that helps you serve web content over the internet. You can use it to host websites and web applications, making it essential for web development. Apache offers high performance and flexibility, allowing you to customize it with various modules. It is cross-platform, which means it works on different operating systems like Windows, macOS, and Linux. Apache integrates well with other technologies, such as PHP, Python, and MySQL, providing a comprehensive solution for web hosting needs.
This guide shows you how to install Apache on a Rocky Linux 9.
Prerequisites
To get started, ensure you have the following:
- A Rocky Linux 9 server. We recommend a Digital Ocean VPS server.
- A non-root user account with
sudoprivileges. Read our guide on how to Create a Non-root sudo user account on Rocky Linux 9.
Update and Install Apache
In this section, you will update your package list and install Apache. Keeping your package list updated ensures you get the latest available packages.
-
Update your package list.
CONSOLE$ sudo dnf update -yThis command refreshes your package list to get the most recent versions.
-
Install Apache.
CONSOLE$ sudo dnf install httpd -yThis command downloads and installs Apache on your system.
Enable Firewall for Apache
In this section, you will configure your firewall to allow HTTP and HTTPS traffic. These protocols are necessary for Apache to serve web content.
-
Allow HTTP and HTTPS traffic.
CONSOLE$ sudo firewall-cmd --permanent --add-service=http $ sudo firewall-cmd --permanent --add-service=httpsThese commands open the necessary ports (80 for HTTP and 443 for HTTPS) to enable Apache to handle web traffic.
Output:
success -
Reload the firewall to apply the changes.
CONSOLE$ sudo firewall-cmd --reloadThis command reloads the firewall settings to apply the changes.
Output:
success
Start and Manage Apache Service
In this section, you will start the Apache service and manage it using systemctl. This includes enabling Apache to start at boot, stopping, and restarting Apache.
-
Start Apache service.
CONSOLE$ sudo systemctl start httpdThis command starts the Apache service.
-
Enable Apache to start at boot.
CONSOLE$ sudo systemctl enable httpdThis command configures Apache to start automatically at boot.
-
Stop Apache service.
CONSOLE$ sudo systemctl stop httpdThis command stops the Apache service.
-
Restart the Apache service.
CONSOLE$ sudo systemctl restart httpdThis command restarts the Apache service.
Apache Directory Structure
In this section, you will learn about the Apache directory structure and the location of various configuration files and the web root directory.
-
Main Apache configuration file.
CONSOLE/etc/httpd/conf/httpd.conf -
Additional Apache configuration files.
CONSOLE/etc/httpd/conf.d/ -
Default web-root for storing website files.
CONSOLE/var/www/html/
Verify Apache Installation
In this section, you will verify that Apache runs correctly. You will also ensure that your firewall settings allow web traffic.
-
Check Apache status.
CONSOLE$ sudo systemctl status httpdThis command shows the status of Apache. If it is active and running, you will see a message indicating that.
Output:
● httpd.service - The Apache HTTP Server Loaded: loaded (/usr/lib/systemd/system/httpd.service; enabled; preset: disabled) Active: active (running) since Thu 2025-01-02 09:12:34 UTC; 25s ago Docs: man:httpd.service(8) -
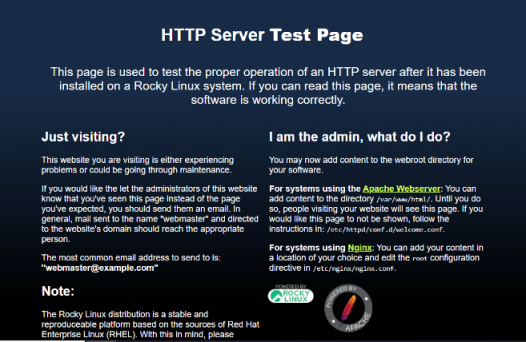
Open a web browser and navigate to your server's public IP address.
http://192.168.0.1 -
You should see the default Apache welcome page, confirming that Apache is installed and functioning correctly.

Conclusion
You have installed Apache on your Rocky Linux 9 server. This guide covered updating your package list, installing Apache, enabling the firewall, managing the Apache service, and understanding the Apache directory structure. Apache is now ready to serve your web content. You can start configuring your web server and deploying your websites. Consider setting up virtual hosts, securing your server with SSL/TLS, and optimizing performance to enhance your server's capabilities.